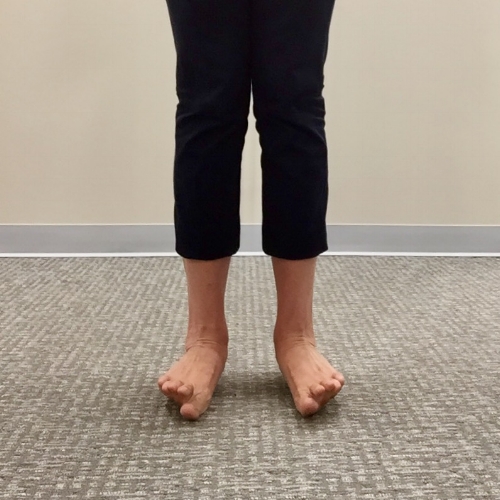
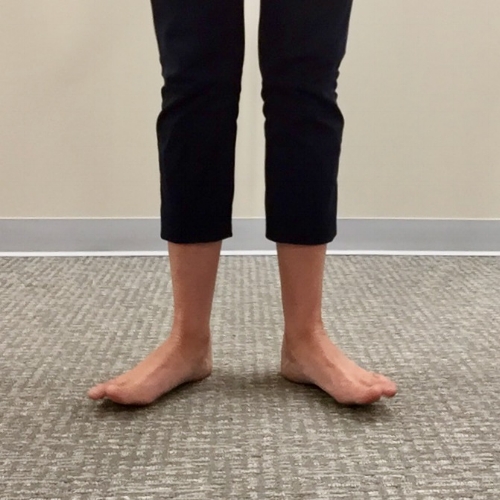
Have you ever suffered from shin splints? Achilles tendinitis? Plantar fasciitis? Ankle sprain? Knee problems? Foot drills are simple, easy, and a free way to combat these issues - if done daily.
The foot does a lot of work for the body. Tremendous stresses are placed on the foot. When running, the foot sustains forces up to 7x your body weight. With jumping activities the forces get up to 20x your body weight. If you think about how you can take ~1750 steps when running a mile, that 7x your body weight really adds up quickly!
The foot drills work by developing a clearer neurological pathway from the foot to the brain. When you practice activities, they become easier. The foot drills challenge your balance and proprioception (awareness). Usually the balance and muscle awareness we have come from input from our muscles. Our feet don't have many muscles in them, and so it is harder to develop this pathway to the brain. Also our feet are about as far from our brain as you can get, therefore the neurological pathway is the longest. This is why you need to do the drills DAILY! The more you do them, the better the neurological connection between your feet and your brain. Developing a better brain-foot connection leads to a more steady and surer gait. When your foot strikes the ground, your brain is aware of the process, it controls your foot, and you have a stable landing.
There are a total of 6 foot drills. Each drill should be done over ~25 meters. You can do the drills at your own pace. To do all 6 drills, it takes about 4 minutes.
1. Inversion - walk forward only putting weight on the outside parts of your feet
2. Eversion - walk forward only putting weight on the inside parts of your feet
3. Toe-in - walk forward with your toes pointing inwards (some people call this pigeon toed)
4. Toe-out - walk forward with your toes pointed outwards
5. Toe walk - walk BACKWARDS on your toes
6. Heel walk - walk forward on only the heels of your feet
(you can wear shoes to protect against bruising the heel)
Those aren't so bad are they? Pretty simple. You can do them in the office (like Dr. Emily did for the photos here) or right before your daily exercise. The idea behind these foot drills came from Dr. Russ Ebbets. He is a chiropractor with an extensive background with USA Track and Field. He started implementing these drills in his athletes in 1987, and found that if done once daily, his athletes stayed healthy and were able to perform better.


