Breathing 101? I’ve been breathing since day 1, I think I’ve gotten this whole breathing thing down. Breathe in, breathe out, repeat. What else is there?
A lot of different factors led to this post. One – May is National Posture Month! Studies show that poor posture can decrease your lung capacity by up to 30%. Also breathing improperly can lead to other musculoskeletal issues that you may not even realize are a result of poor breathing mechanics.
I always like the saying “good posture is its own reward.” Being able to use your full lung capacity is always a plus! Being able to use it correctly is also helpful!
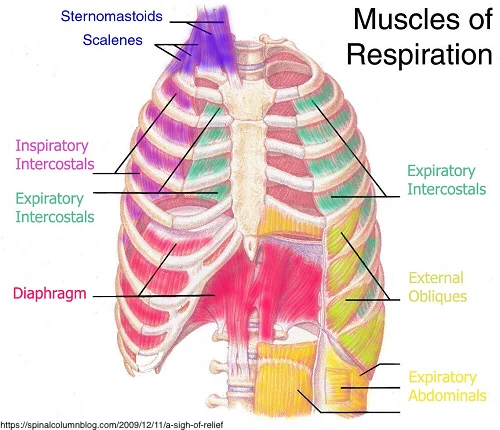
Time to dig into some anatomy. Check out the image below of all the muscles that are involved in breathing!
The diaphragm is that big huge pink colored muscle in the bottom of the picture. Ideally it does most of the work for breathing. That makes sense, it’s a big muscle, and it covers the whole bottom surface of the lungs. Using the diaphragm to breathe, pulls down on the bottom part of the lungs pulling air into the lungs.
The purple muscles at the top of the picture, the sternocleidomastoid (SCM) and scalenes, are the accessory muscles of respiration. They are supposed to be used during times of increased demand like fight or flight. If you start relying on these muscles all the time instead of just those high need times, those small muscles will start to fatigue and can cause other problems. When the scalenes get over used and are too tight, they can start irritating the nerves that travel near them. One potential side effect is thoracic outlet syndrome. When the sternocleidomastoid muscle is over used, you can develop trigger points (knots) that can occasionally refer pain to different areas of your head. The image below is an example of the referred pain some people experience from trigger points in the sternocleidomastoid.
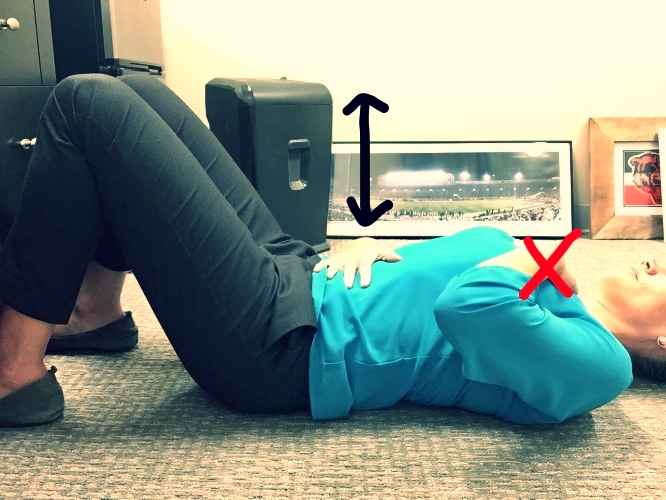
So now that we’ve covered why you should work on diaphragmatic breathing, let’s get in to the HOW! Dr. Emily feels that the easiest place to start is laying on the floor with a hand over your chest and a hand over your stomach. Then you just breathe. While you are breathing, focus on keeping the hand on your chest still, and drawing in the breath from your belly. Then you can think of tightening your stomach muscles as you exhale.
Dr. Emily feels that the easiest way to start incorporating these breathing exercises into your life are first thing in the morning and the last thing before you go to bed at night. Lay in bed and practice breathing for 5-10 minutes in the morning and the evening. As you get better at this, you can practice while sitting, too. To perform these exercises while sitting, you put your hands on your chest and belly, and practice breathing keeping your chest still. You slowly increase the amount of times practicing your breathing, and eventually it will become your norm.
Happy breathing!


